by Sharon Warren
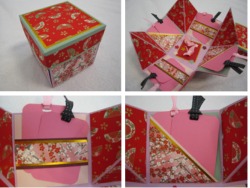
Explosion Box
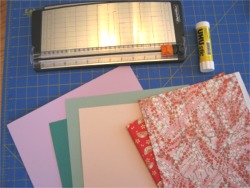
1 sheet of 12" x 12" heavy weight cardstock
1 sheet of 8-1/2" x 11" heavy weight cardstock
extra cardstock for decorating the finished box
patterned paper for decorating the finished box
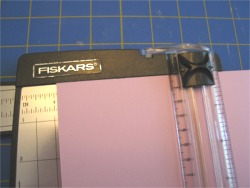
paper slicer
scoring tool
straight edge
scissors
UHU glue
Making the Box
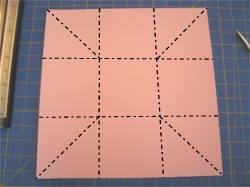
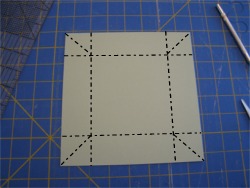
Step 1 - Score the 12" x 12" sheet 4 inches from the edge.
Step 2 - Rotate the sheet 90 degrees and score again at 4 inches from the edge.
Step 3 - Rotate 90 degrees and score again at 4 inches.
Step 4 - Then rotate 90 degrees one more time and score at 4 inches. You should have 9 - 4" squares.
Step 5 - Score on the diagonal, from the outside corner of the sheet to the intersection of the scored lines. DO NOT SCORE THE CENTER !
Materials
Directions
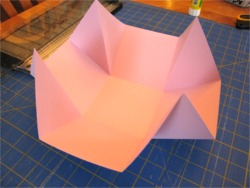
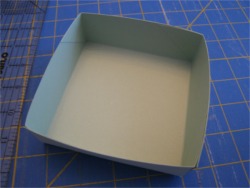
Folding the Box
Fold the scored sheet along the scored lines. Use a bone folder to press all folds.
Making the Lid
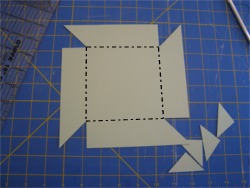
Step 1 - Trim the 8-1/2" x 11" sheet to a 7-1/4" square.
Step 2 - Score the 7-1/4" square 1-1/2" from the edge.
Step 3 - Rotate the square 90 degrees and score 1-1/2" from the edge.
Step 4 - Rotate 90 degrees and score again 1-1/2" from the edge.
Step 5 - Then rotate 90 degrees one more time and score 1-1/2" from the edge.
You should have a 4-1/4" square in the center.
Step 6 - Score the diagonal of each 1-1/2" corner square. DO NOT SCORE THE CENTER!
Step 7 - Cut out the right triangle of each 1-1/2" corner square.
Folding the Lid
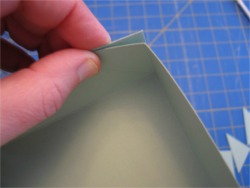
Step 1 - Fold the scored sheet along the scored lines. Use a bone folder to press all folds.
Step 2 - Tuck the left triangle INSIDE the lip of the lid. Glue the corners together.
Decorate and Enjoy!!!
I like to decorate the inside with patterned paper and pockets filled with tags, maybe some origami nestled in the center.
If you have any questions, please ask!