by Sharon Warren
A No-Sew Star Book
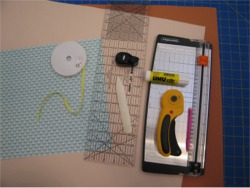
2 sheets of 22" x 28" 100 lb paper
1 sheet of 8-1/2" x 11" patterned paper
ribbon
paper slicer
scoring tool
straight edge
punch
UHU glue
double-stick tape
Cutting and Scoring
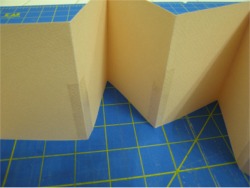
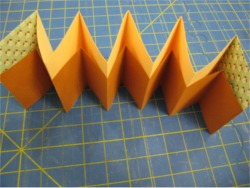
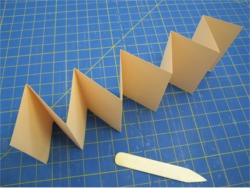
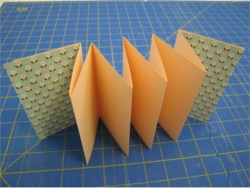
Step 1 - Cut one 4" x 28" strip and score every 3 inches. Fan fold the paper and use the bone folder to
Step 2 - Cut one 3" x 28" strip and score every 2 inches. Fan fold the paper and use the bone folder
NOTE!! If you use 28" wide paper, then the outside panels of either strip are too short.
Materials
Directions
Step 3 - Cut four 3" x 4" squares from the sheet
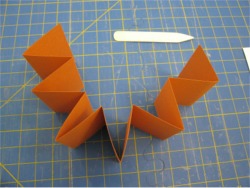
Creating the Star
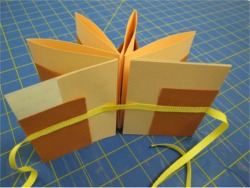
Step 1 - Glue the first panel of the brown strip to
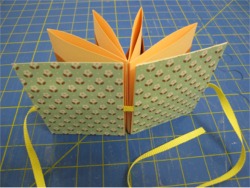
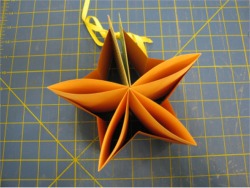
Decorate and Enjoy!!!
You can decorate the inside with patterned paper and pockets filled with tags, maybe even add a third layer.
If you have any questions, please ask!
Step 2 - Working with the side that has 4 peaks, place a piece of double-stick tape on each peak.
Step 3 - Stick the 4 brown peaks to the 4 cream peaks.
Step 4 - After making the ends of the ribbon even, glue the ribbon to the outside panels.
Step 5 - Glue the last 2 squares of pattered paper to the outside panels.